
LTX Studio AI Video Generator: How to use, Pricing, Review 2025

Table Of Content
- Getting Started with LTX Studio
- What is LTX Studio?
- Pricing Options
- How to Use LTX Studio?
- Step 1: Starting with an Idea
- Step 2: Creating Characters
- Step 3: Generating the Storyboard
- Step 4: Editing Shots
- Step 5: Adding Motion and Sound Effects
- Step 6: Animating Characters
- Step 7: Sharing and Exporting
- Advanced Features
- Canvas Tool
- Using External Images
- Final Thoughts
In this article, I’ll walk you through how to use LTX Studio, a free AI-powered tool that can generate full stories, characters, and even videos from simple prompts. I’ll also show you how to use its Face Capture feature to bring your characters to life.
Getting Started with LTX Studio
What is LTX Studio?
LTX Studio is an AI-powered platform designed to help you visualize your concepts and turn them into complete stories. If you have a script, a story idea, or just a few images, LTX Studio can transform your ideas into a storyboard, create characters, and even generate videos. It’s a versatile tool for anyone looking to create visual content quickly and easily.
Pricing Options
One of the best things about LTX Studio is that it offers a free version. Here’s a quick breakdown of the pricing tiers:
- Free Version: 3,600 computing seconds per month.
- $15/month Version: 8,640 computing seconds per month.
- Higher tiers offer more computing seconds, but the free version is a great starting point.
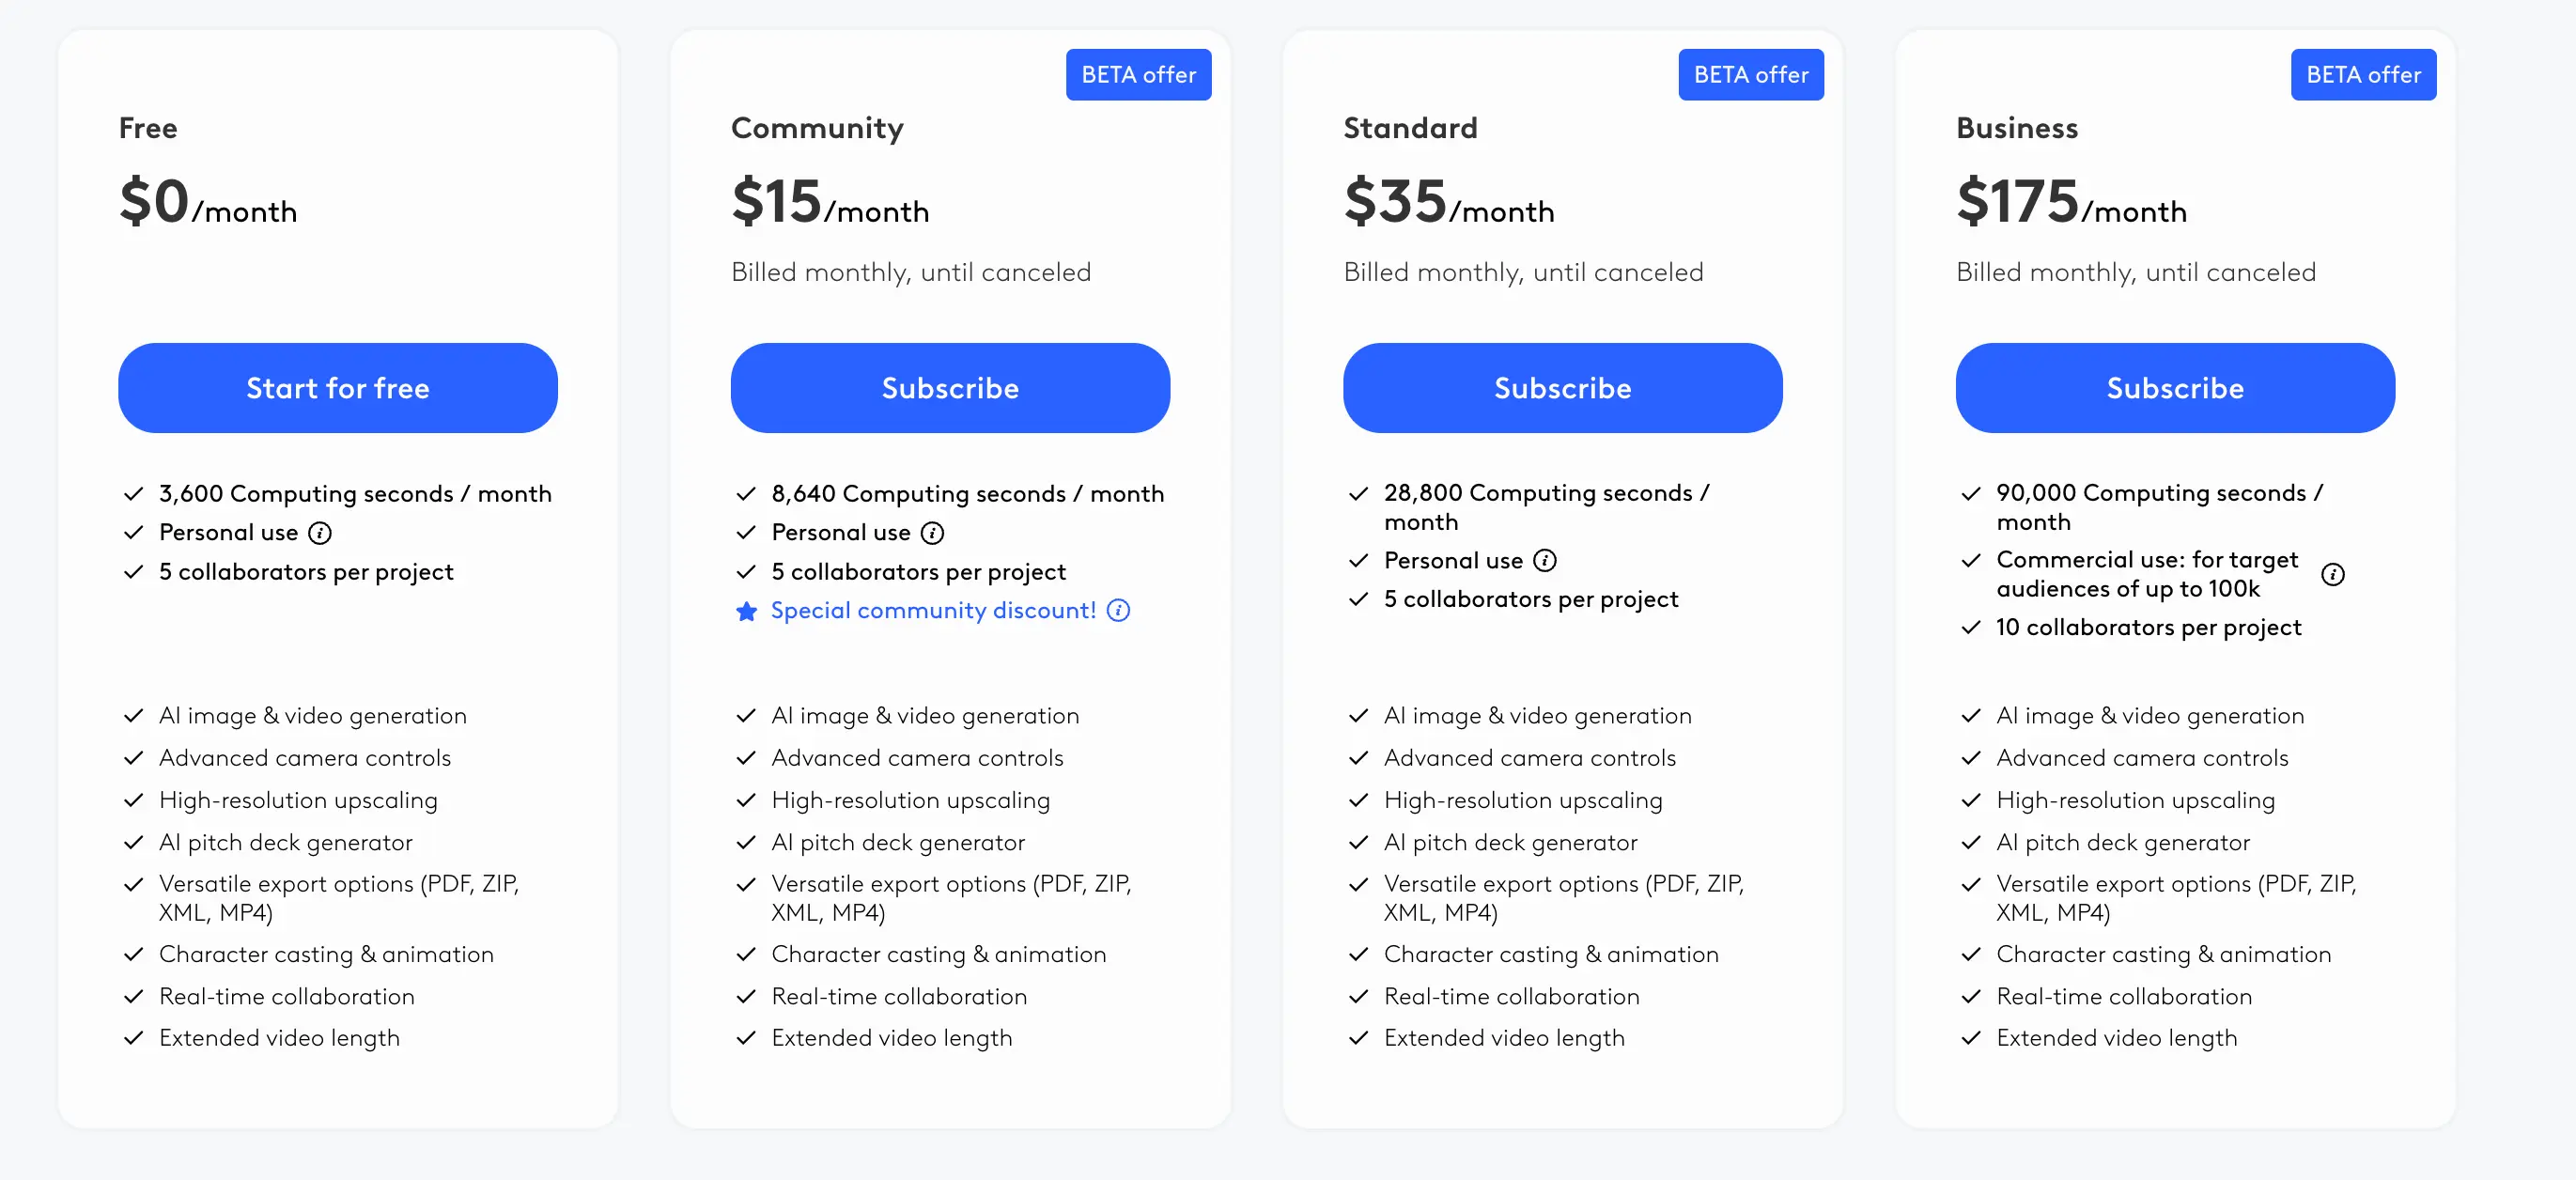
If you need more computing time, you can always create multiple accounts or upgrade to the affordable $15/month plan.
How to Use LTX Studio?
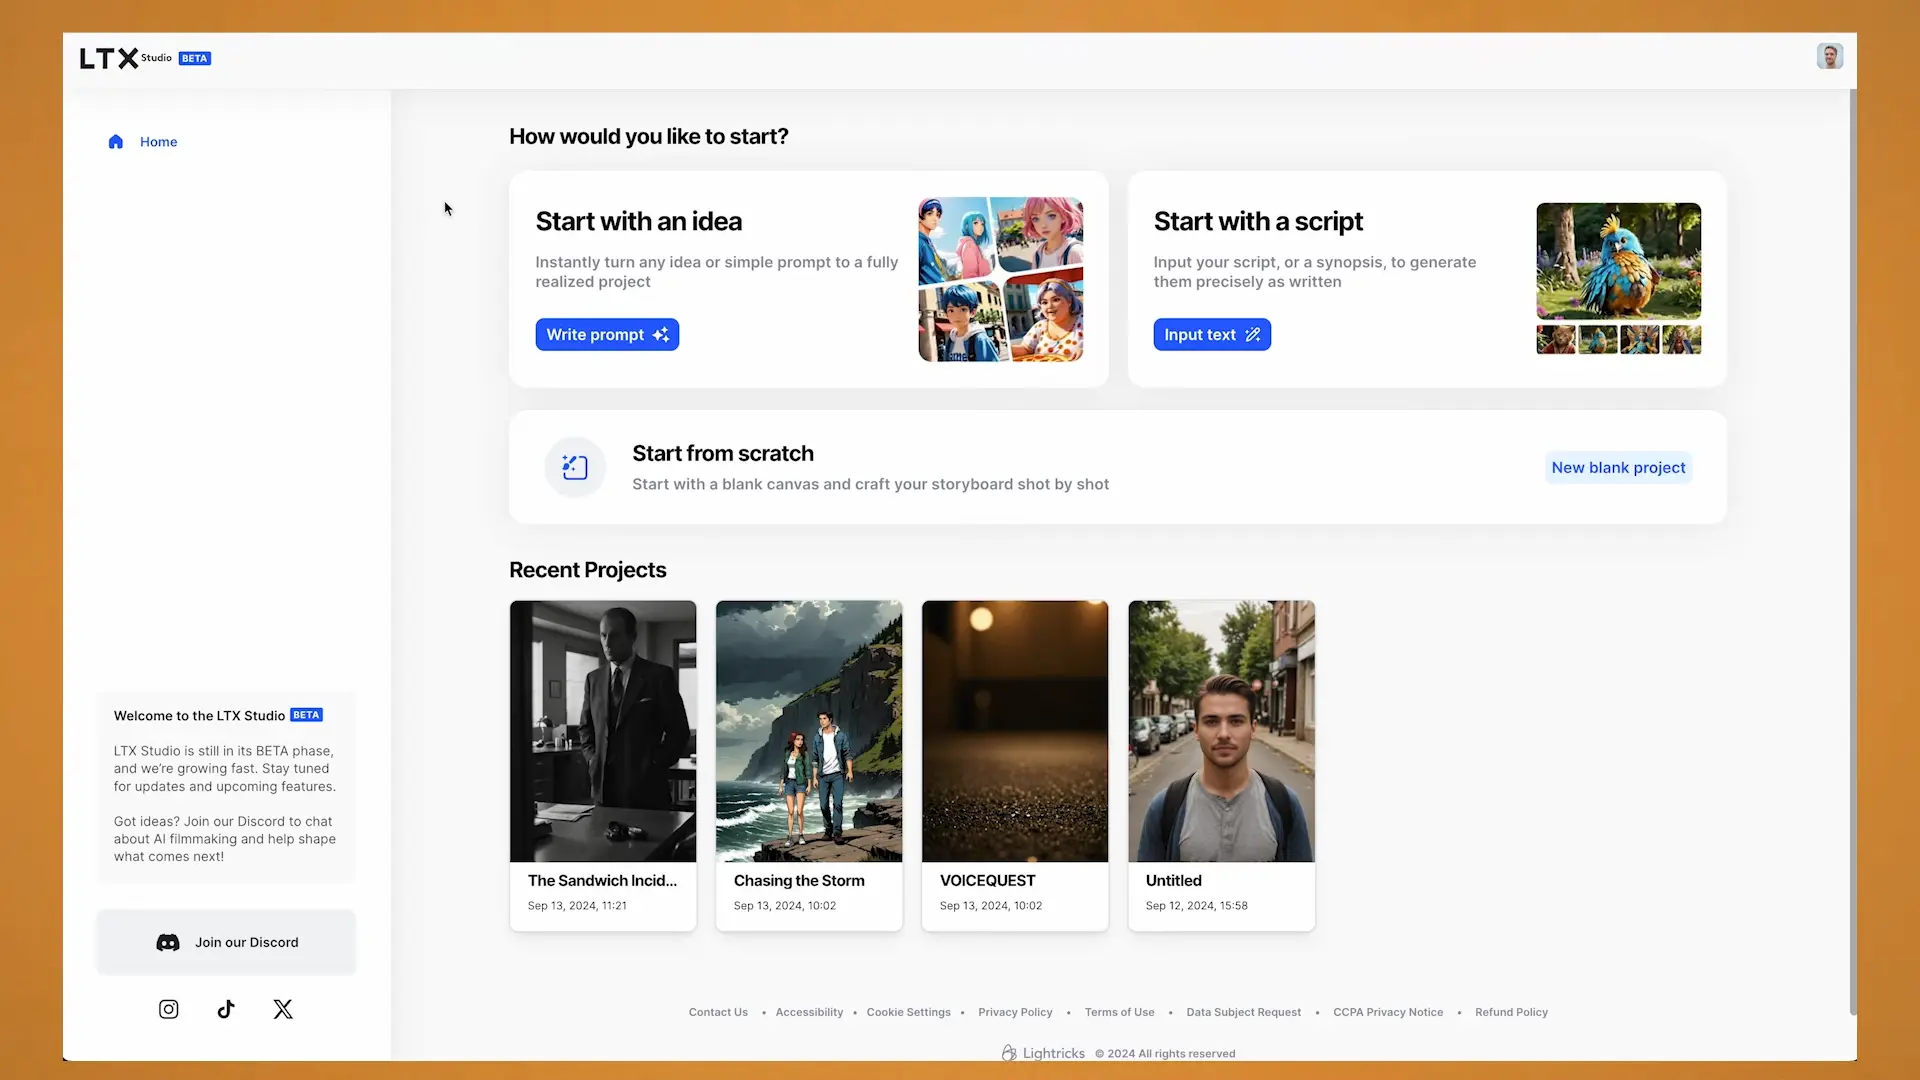
Step 1: Starting with an Idea
When you first visit the LTX Studio website, you’ll notice how user-friendly it is. You can start with a simple prompt, upload a script, or create a storyboard from scratch.
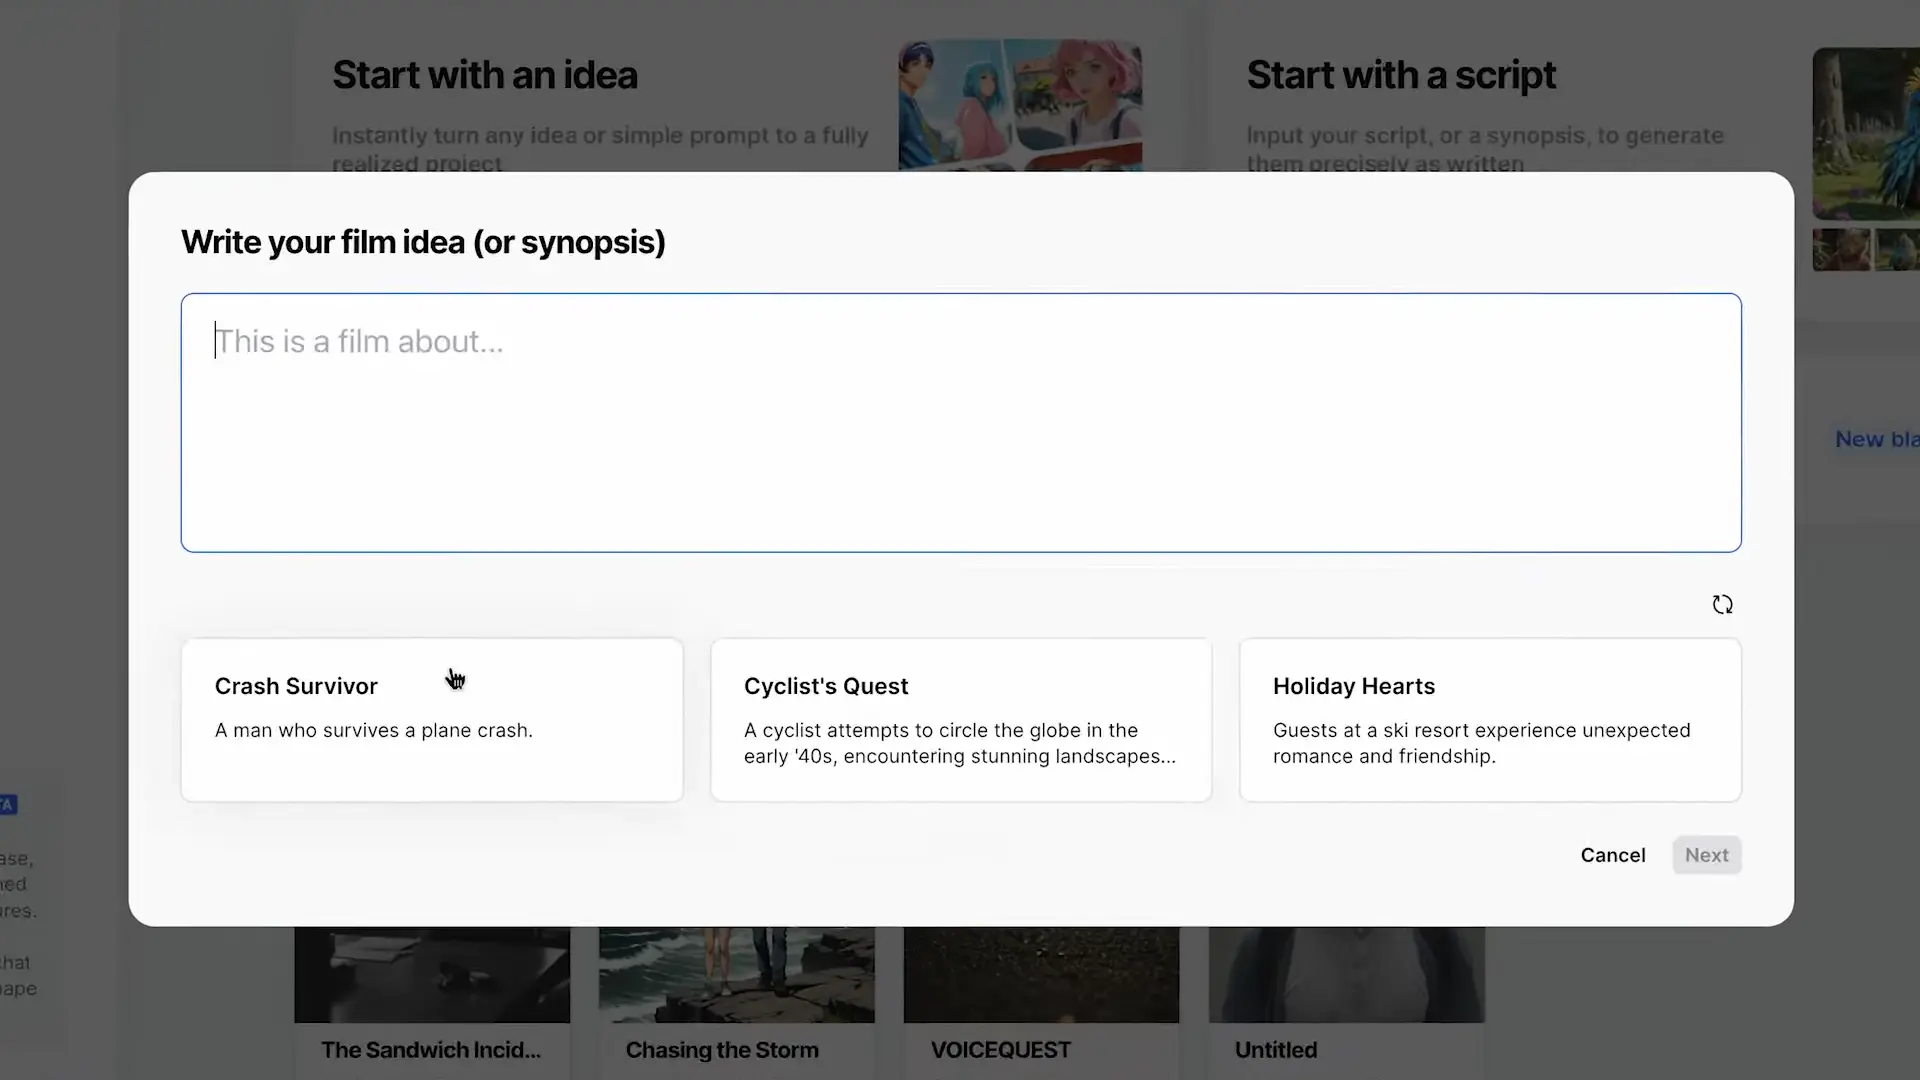
For this tutorial, I’ll use one of the preloaded ideas provided by LTX Studio: Crash Survivor.
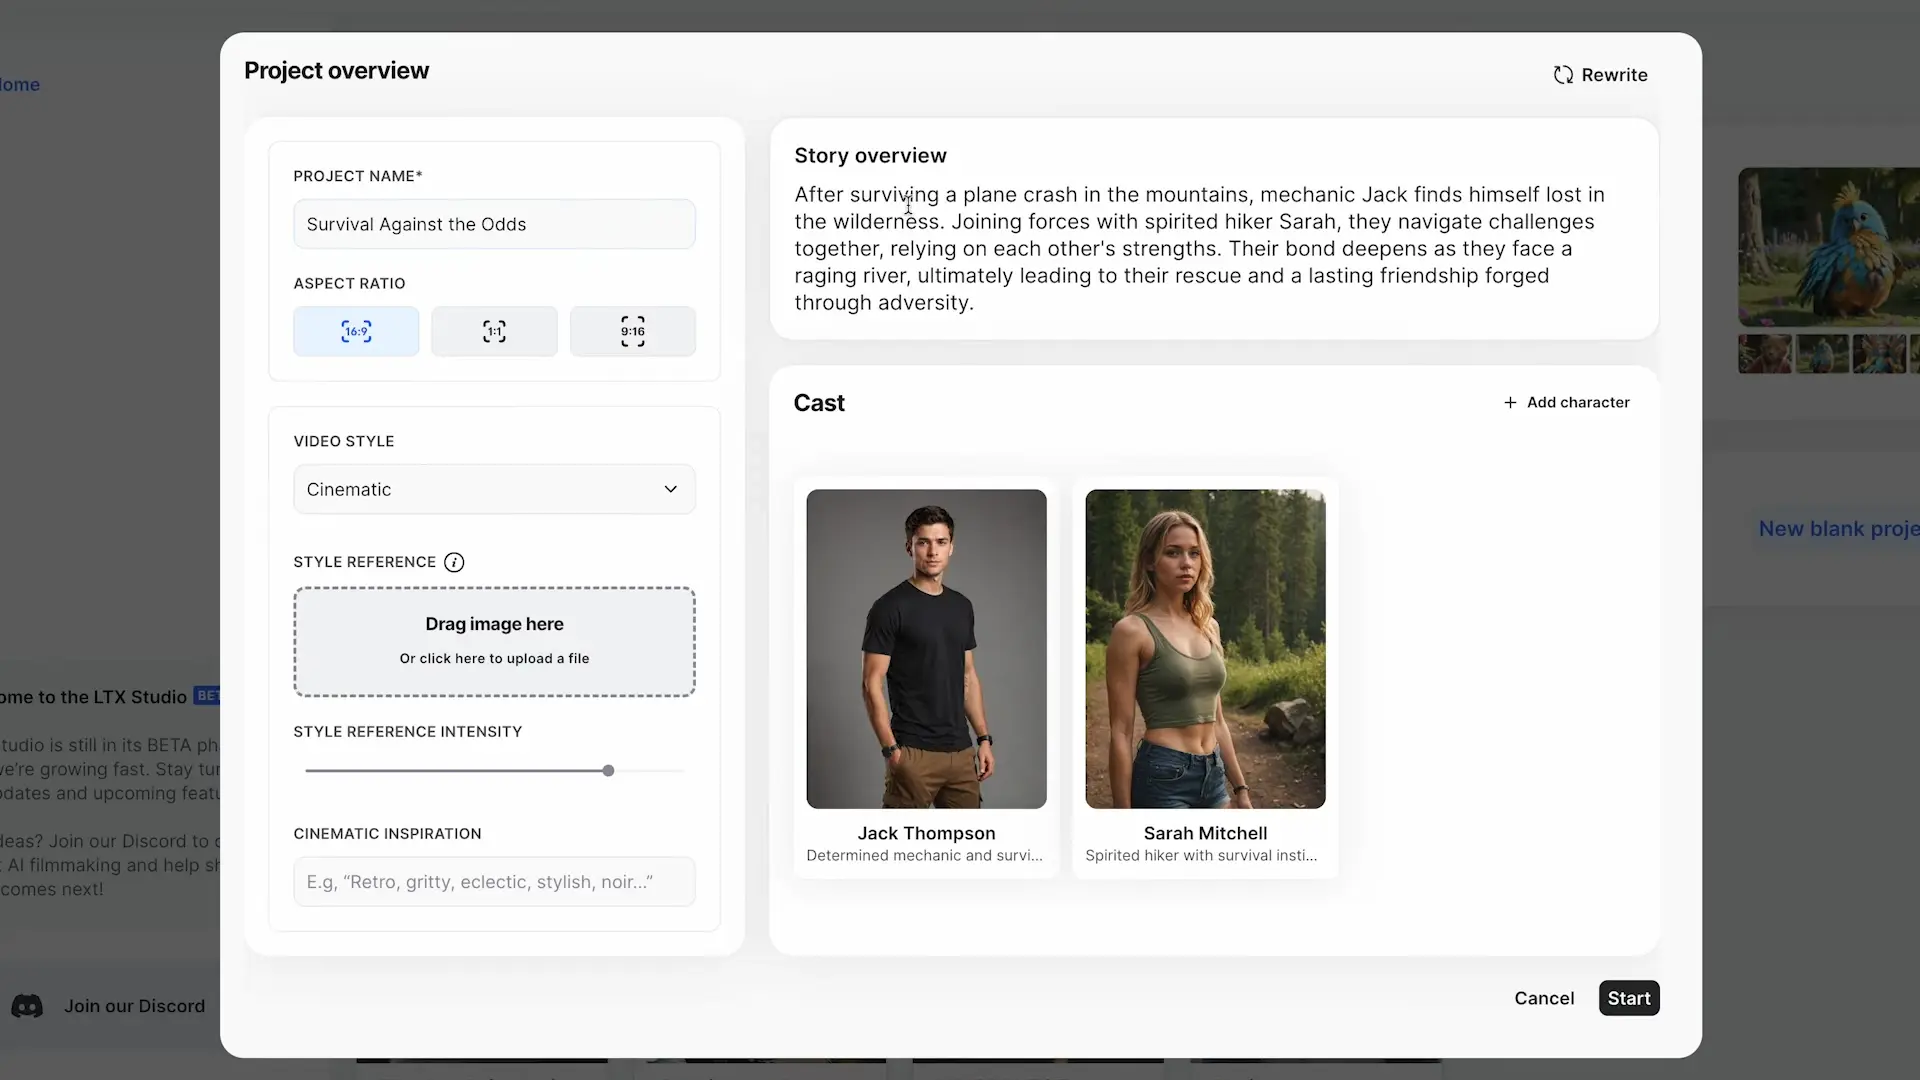
- Selecting a Prompt: Under the “Start with an Idea” section, I chose the “Crash Survivor” prompt. LTX Studio automatically generates a title and a story overview for the project.
- Customizing the Aspect Ratio: You can change the aspect ratio to widescreen, square, or portrait (smartphone-friendly).
- Choosing a Video Style: LTX Studio offers a variety of video styles. You can select one that fits your story or even upload your own image to define the style.
Step 2: Creating Characters
LTX Studio automatically generates characters based on your story. For the “Crash Survivor” prompt, it created two characters: Jack and Sarah.
-
Editing Characters: If you don’t like the default characters, you can reload them or edit their details:
- Name: Change the character’s name.
- Age: Adjust the age, and the character’s appearance will update automatically.
- Essence: This reshapes the plot based on the traits you assign.
- Appearance: Customize clothing and other visual details.
- Voice: Choose from a variety of voice options for your characters.
For example, I changed Jack’s age from 28 to 60, and the character’s appearance updated instantly.
- Adding Custom Faces: You can upload a custom face (e.g., your own or a character you’ve created elsewhere) to make the character look more personalized.
Step 3: Generating the Storyboard
Once you’re happy with the characters and style, click Start to generate the storyboard. LTX Studio breaks the story into scenes and shots:
- Scene 1: 4 shots.
- Scene 2: 4 shots.
- Scene 3: 4 shots.
- Scene 4: 9 shots.
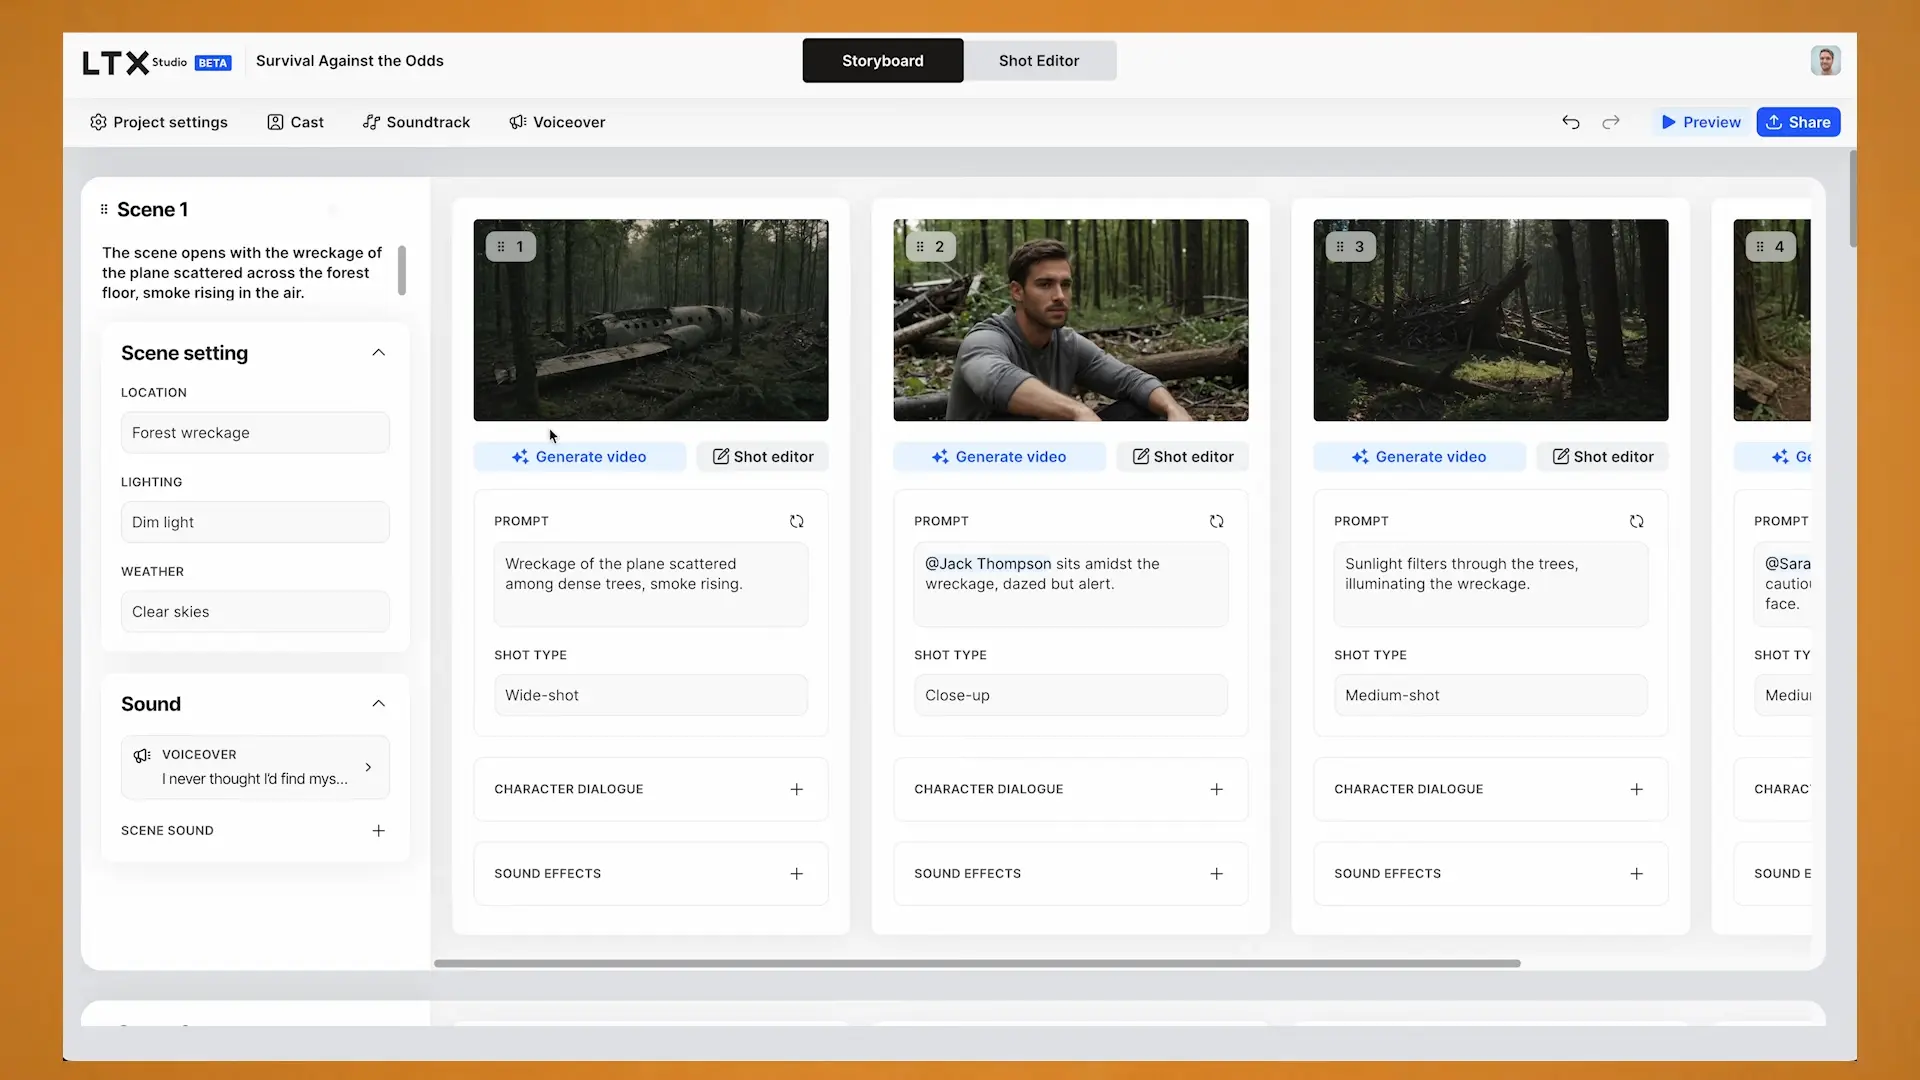
Each scene includes details like location, lighting, and weather, which you can customize. You can also add voiceovers and sound effects to enhance the story.
Step 4: Editing Shots
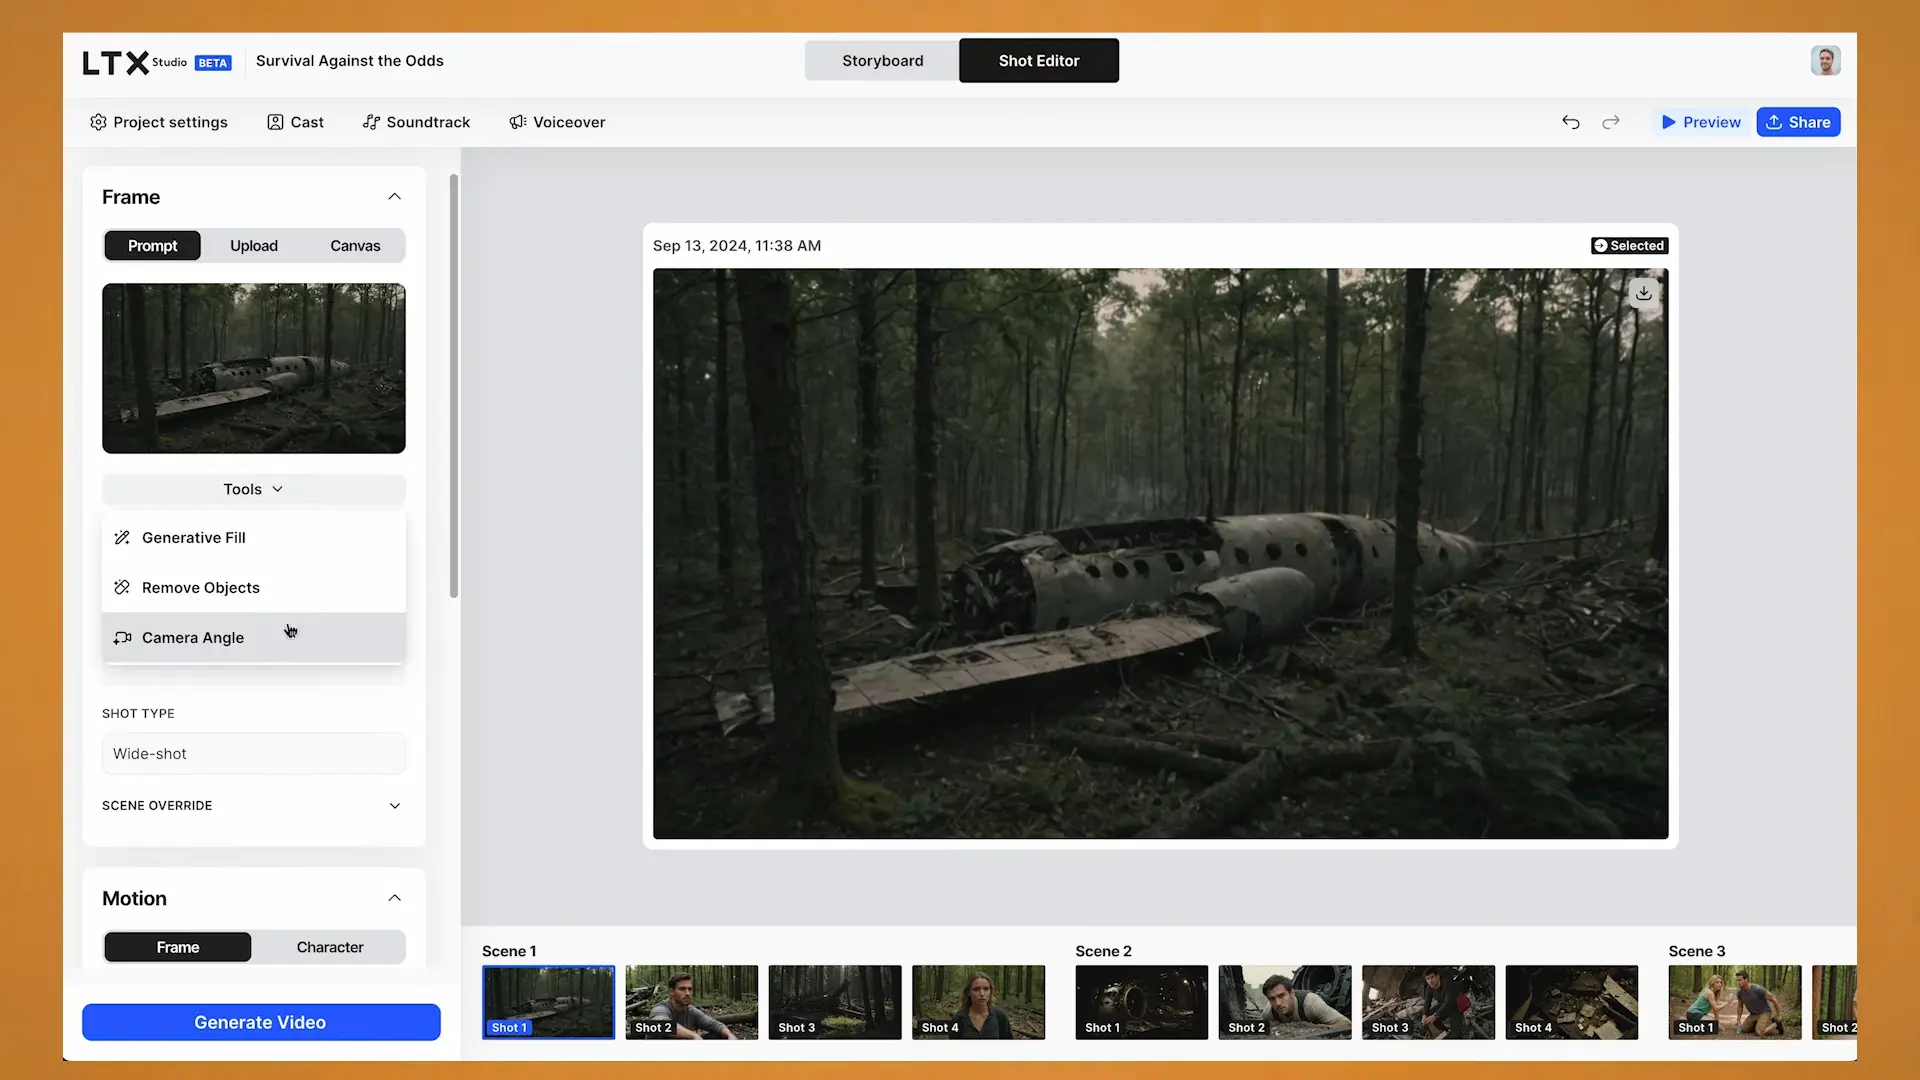
LTX Studio provides a lot of control over each shot:
- Shot Editor: You can upload your own images (e.g., created in MidJourney) or use the Canvas feature to draw and generate images.
- Generative Fill: Replace parts of an image.
- Remove Objects: Remove unwanted elements from the image.
- Camera Angle: Adjust the camera angle for each shot.
Step 5: Adding Motion and Sound Effects
- Motion Settings: Choose from three motion settings—Scene Motion, Natural, and Extreme. You can also adjust the frames per second and duration of the video.
- Sound Effects: Add sound effects to your shots. For example, I added a forest sound effect to one of the scenes.
Step 6: Animating Characters
LTX Studio allows you to animate characters using Face Capture:
-
Character Dialogue: Add text, and LTX Studio will generate a video with the character speaking.
-
Face Capture: Use your webcam to record your face and animate the character. Keep your head centered and maintain a neutral expression while recording.
For example, I recorded myself saying, “What happened? How the hell did I survive this?” and applied it to the character.
Step 7: Sharing and Exporting
Once your project is complete, you can:
- Share: Share your project or create a pitch deck.
- Export: Export the project as an XML file for use in video editing software like Adobe Premiere Pro or DaVinci Resolve.
- Download: Download the final video.
Advanced Features
Canvas Tool
The Canvas feature lets you draw and describe an image, which LTX Studio will generate in real-time. For example, I drew a simple wavy line and described it as an “epic landscape,” and the tool created a stunning image.
Using External Images
You can also create stories using images made outside of LTX Studio. For example, I uploaded images created in MidJourney and animated them in LTX Studio. I recorded voiceovers for each character and used 11 Labs to modify the voices for uniqueness.
Final Thoughts
LTX Studio is an incredibly powerful tool for creating stories, characters, and videos with minimal effort. The free version is perfect for beginners, and the affordable $8/month plan offers more flexibility.
Related Posts

3DTrajMaster: A Step-by-Step Guide to Video Motion Control
Browser Use is an AI-powered browser automation framework that lets AI agents control your browser to automate web tasks like scraping, form filling, and website interactions.
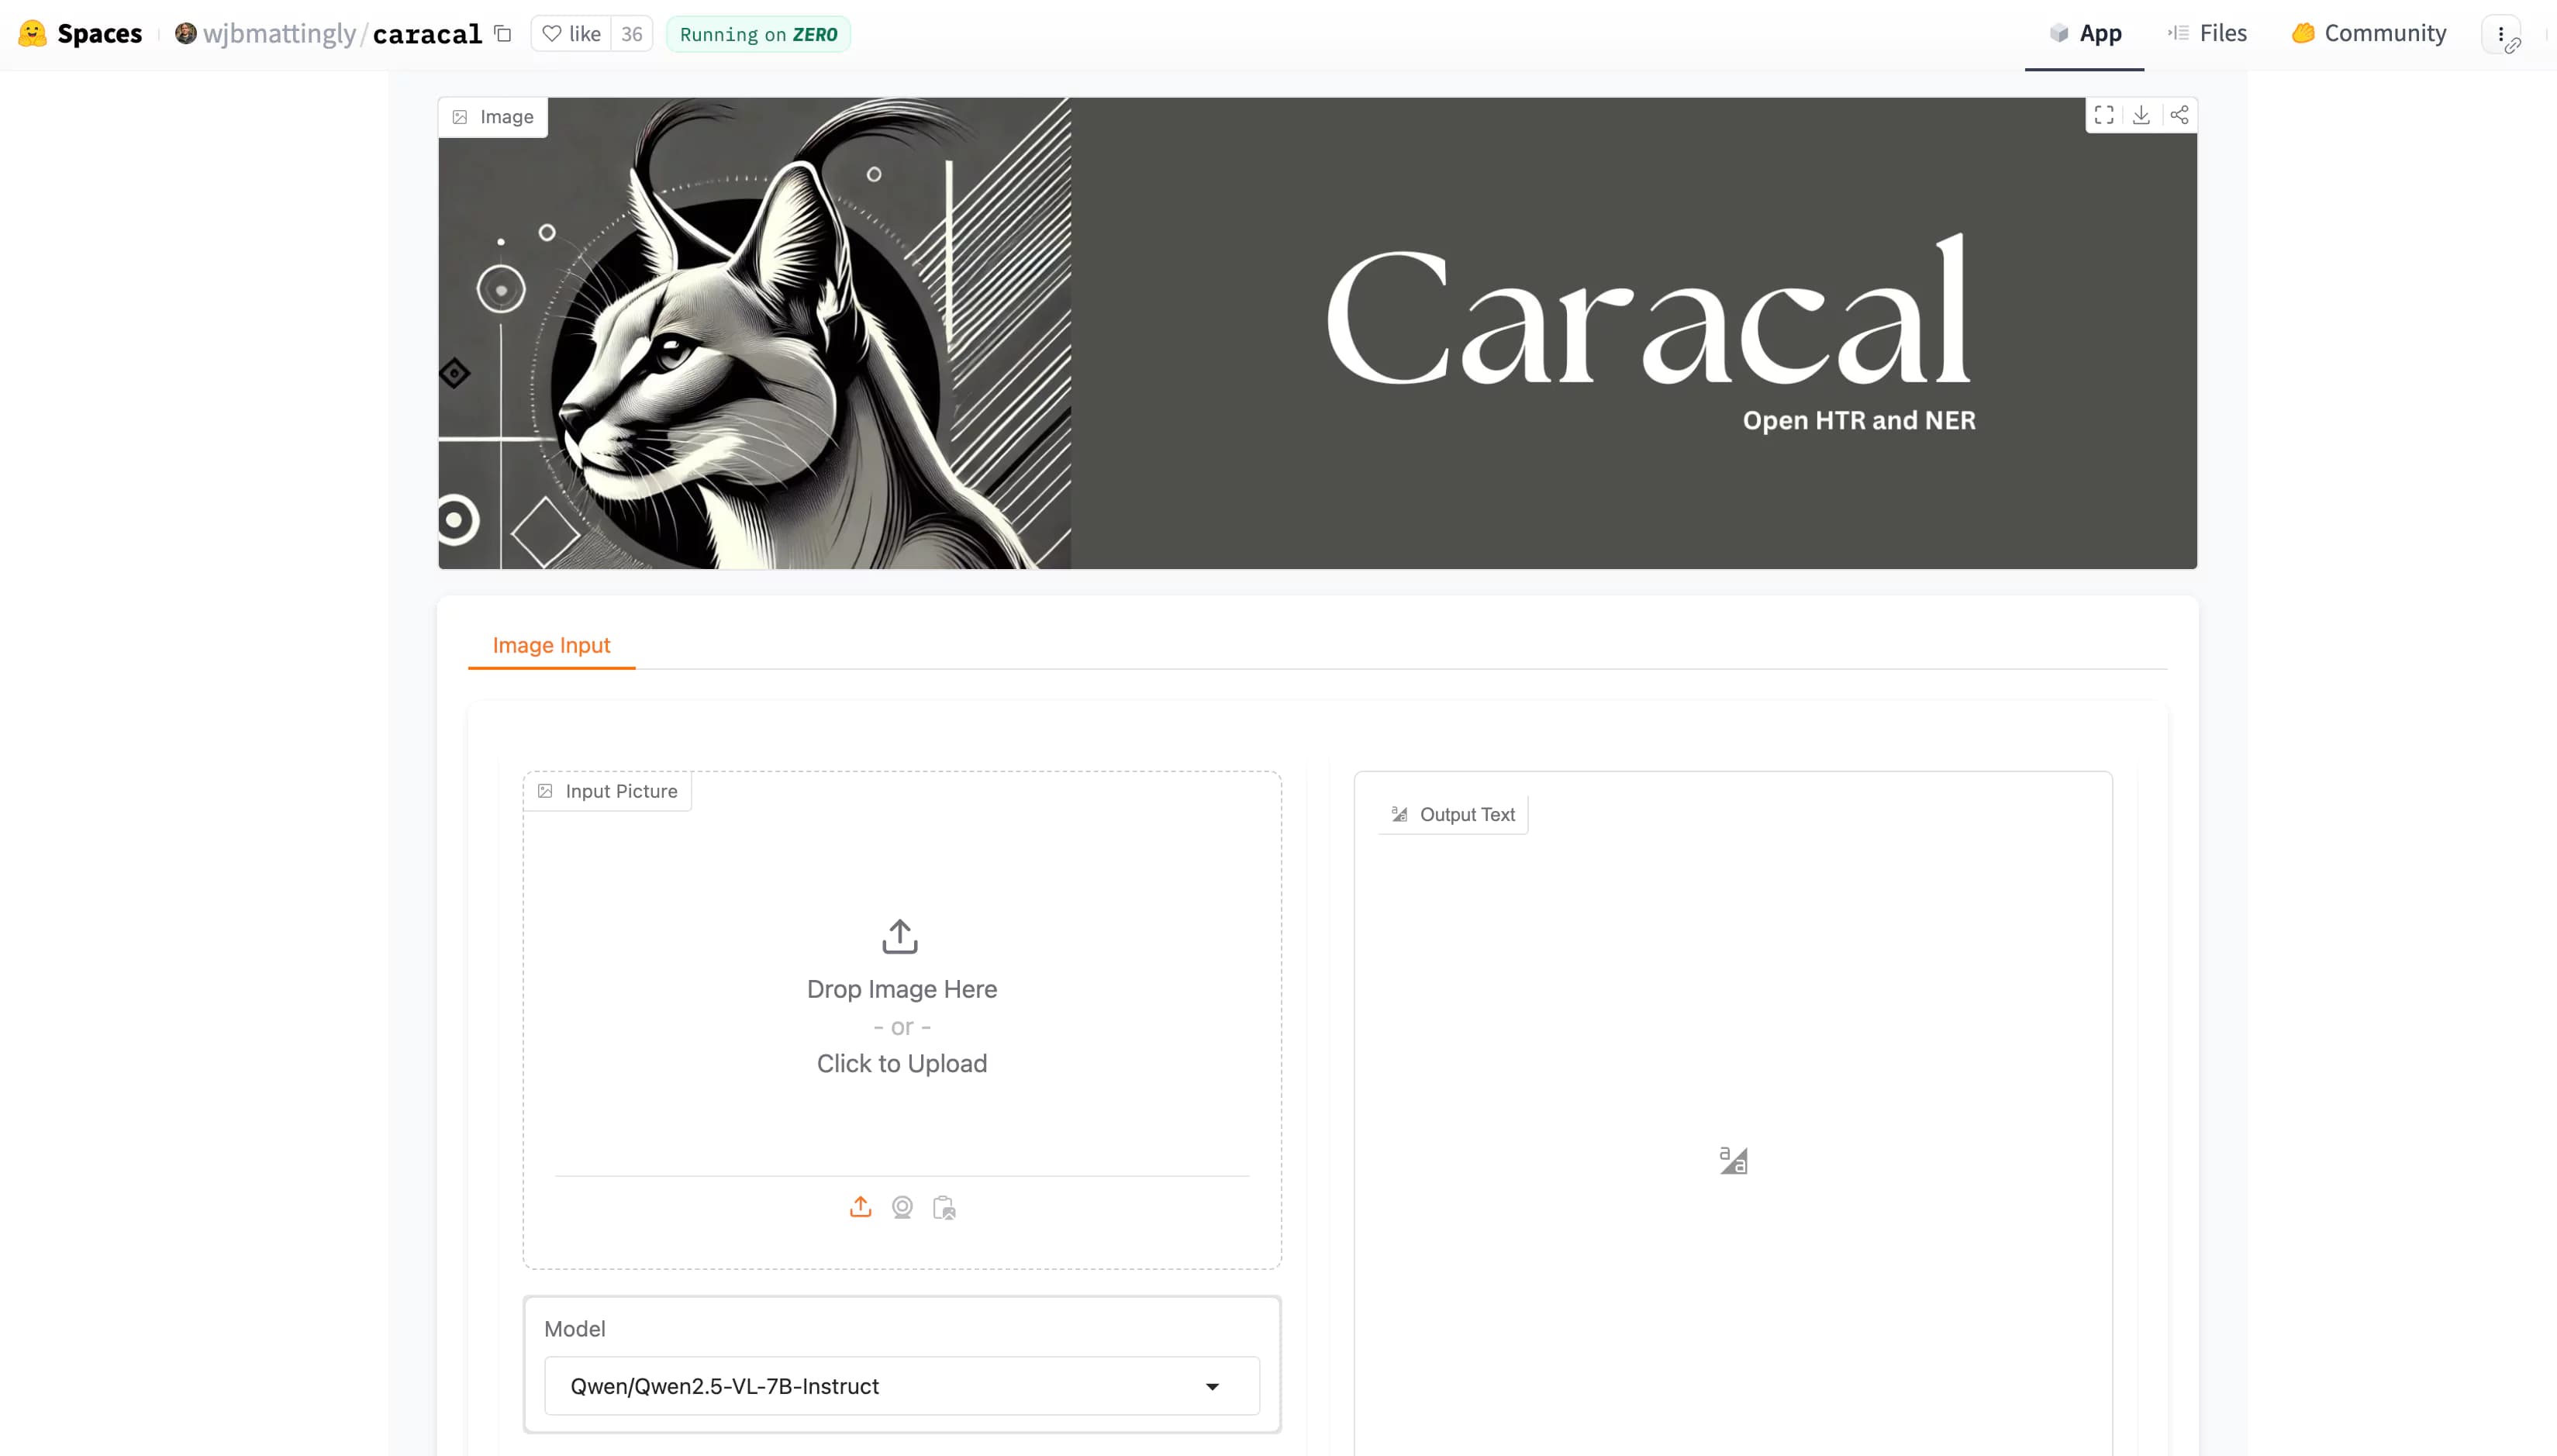
Caracal AI: Free Tool for Handwritten Text Recognition, Extract text from Images
Caracal is a text recognition project that has been widely cloned and fine-tuned by users for specific purposes. The project leverages advanced technology for text recognition tasks, as highlighted in the provided transcript snippet.

Browser-Use Free AI Agent: Now AI Can control your Web Browser
Browser Use is an AI-powered browser automation framework that lets AI agents control your browser to automate web tasks like scraping, form filling, and website interactions.